
In this post, we'll go over how to set up a Raspberry Pi Zero Wireless through the terminal. When I was setting this up, I ran into numerous issues and there wasn't a single tutorial that worked for me end to end. I've documented the steps I took, hopefully it helps someone out there with setting up.
For the past two months, I've been running a bot to scrape data on social media platforms. First, I ran the bot on my Digital Ocean server (the same server that hosts this blog), but I quickly got shadow banned. I figured Digital Ocean IPs were easily recognized and mass blocked. As such, I started running it locally on my home laptop, and it's been performing quite well.
After running this for a couple of months, I've been experiencing a couple of inconveniences. For one, I need to leave my laptop on 24/7 just for the bot to run (which is a waste of electricity). The bot is also susceptible to accidentally turning off (moving mouse away from the hot corner) without me noticing, since I dim the screen to total black.
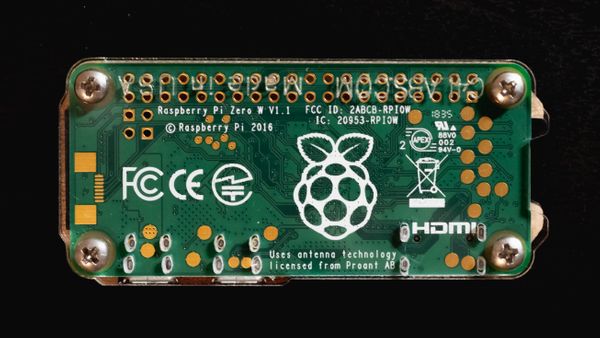
As such, I decided I would get a single board computer. I figured I didn't need a lot of processing power since I'm running mostly a network bound bot. Thus I got the Raspberry Pi Zero W (with wireless). I bought the Pi from Ada Fruit, a case and micro SD card from Amazon.
Since I didn't have extra monitor, mouse or keyboard, I wanted to set up the Raspberry Bi through ssh. Unfortunately, there are no official guides on how to set up a Raspberry Pi without this way. Fortunately, plenty of people have experienced this problem in the past and there are online guides. Even with numerous guides available, it still took me a few hours to set it up completely. Now, I will walk through the steps I took and the troubles I encountered while setting up the Pi. Initially, I followed this guide on github:
- Download the operating system image from this link:
wget https://downloads.raspberrypi.org/raspbian_lite_latest - Formatted the micro SD card using your choice of tool. This can be used in the built in
diskutiltool on Mac:
diskutil eraseDisk ExFat <name you give to card> <disk number>, example:
diskutil eraseDisk ExFat temp disk2 - Unzip the Raspbian image from the download, mount the image to the SD card:
sudo dd if=<path to image> of=<disk path>, example:
sudo dd if=~/Download/2018-11-13-raspbian-stretch-lite.img of=/dev/disk2
After mounting the image, the guide tells us to set up the wifi. I tried the steps, but no matter what I couldn't get my Mac to ssh into the Pi. I encourage people to try setting up the wifi using the steps outlined in the GitHub gist to see if it works for them. However, if it doesn't work, one can try the following steps for an alternative method to ssh into the Pi:
- Edit the
config.txtfile at the root of the mounted drive and adddtoverlay=dwc2at the bottom of the file - Edit the
cmdline.txtfile at the root of the mountied drive. Addmodules-load=dwc2,g_etherparameter at the end ofrootwaitparameter. - The Pi by default doesn't enable
ssh, so runtouch sshto create an empty ssh file. - After setting up the image, plug the Pi into a computer via the USB port. It's the middle port, it also says "USB" above the port in small white text
- ssh into the Pi by executing
ssh [email protected]. The default password israspberry - Once ssh-ed inside the Pi, configure the wifi file, which is located at
/etc/wpa_supplicant/wpa_supplicant.confwith your wifi settings:
country=US
ctrl_interface=/run/wpa_supplicant
update_config=1

network={
    ssid="myhomenetwork"
    psk="password"
}
- Test wifi connection by running
sudo wpa_supplicant -i wlan0 -c /etc/wpa_supplicant/wpa_supplicant.confand see if any errors show up - Configure Pi to permanently allow ssh access by using the raspi-config -
sudo raspi-config. SelectInterfacing Options, then selectSSH, then selectYESto enable ssh. - Disconnect Pi from computer, and connect to another power source. Try ssh-ing into the Pi using the
ssh [email protected]and it should work. - Update all modules by running
sudo apt-get update && sudo apt-get upgrade -y
With the above steps, I was able to successfully set up the Raspberry Pi Zero W with the above steps. I've also included some references on guides and tutorials I followed.
References
- https://gist.github.com/calebbrewer/837732c5f4f12d12c1226bfcf55a3219
- https://raspberrypi.stackexchange.com/questions/62933/set-up-a-raspberry-pi-zero-w-without-monitor-or-ethernet-module
- https://www.thepolyglotdeveloper.com/2016/06/connect-raspberry-pi-zero-usb-cable-ssh/
- https://raspberrypi.stackexchange.com/questions/87789/setting-up-pi-zero-w-wi-fi-through-usb-ssh
- https://www.losant.com/blog/getting-started-with-the-raspberry-pi-zero-w-without-a-monitor
- https://github.com/timgrossmann/InstaPy/issues/4033#issuecomment-466280659
- https://github.com/timgrossmann/InstaPy/issues/3895
